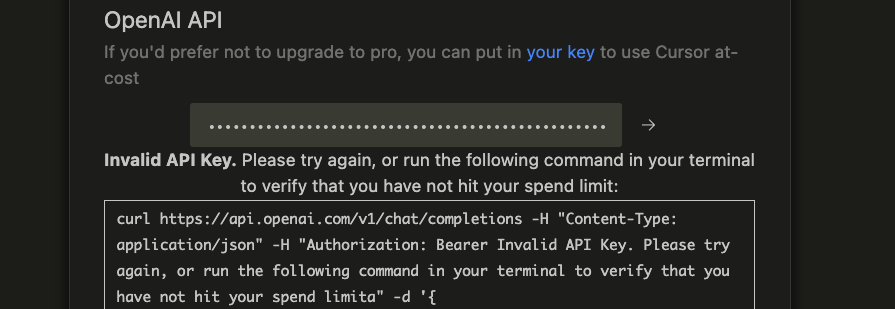
CursorにOpenAIのAPIキーを登録する際、確実に正しいAPIキーを設定しているはずなのになぜかエラーが発生する。。。
といった状況になることがあると思います。
そこで、本記事ではその際発生する「Invalid API Key」エラーの解消方法について解説しています。
確実に正しいAPIキーを設定しているのにもかかわらずエラーになる場合、OpenAI APIのクレジット残高が不足している可能性があります。
その場合OpenAI APIのクレジットのチャージとAPIキーの再作成等をする必要があります。
本記事ではその一連の対処方法について順を追って解説していますので、
ぜひ最後までお読みいただき参考にしてみてください。
「Invalid API Key」エラーの原因
原因として考えられるのは以下の2点です。
- そもそもAPIキーが間違っている
- OpenAI APIのクレジット残高が不足している
1.の場合はAPIキーを再作成すれば解消されると思いますが、2.が原因だった場合当然ながら解消できません。
まずは原因を切り分けるためにエラーメッセージに書かれているコマンドをターミナルで実行してみて下さい。
$ curl https://api.openai.com/v1/chat/completions -H "Content-Type: application/json" -H "Authorization: Bearer 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" -d '{
  "messages": [
    {
      "role": "system",
      "content": "You are a test assistant."
    },
    {
      "role": "user",
      "content": "Testing. Just say hi and nothing else."
    }
  ],
  "model": "gpt-3.5-turbo"
}'エラーメッセージの内容を見ると「You exceeded your current quota(現在の割当を超えました)」と書かれていて、これによりクレジット残高不足が原因と考えられます。
$ curl https://api.openai.com/v1/chat/completions -H "Content-Type: application/json" -H "Authorization: Bearer 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" -d '{
  "messages": [
    {
      "role": "system",
      "content": "You are a test assistant."
    },
    {
      "role": "user",
      "content": "Testing. Just say hi and nothing else."
    }
  ],
  "model": "gpt-3.5-turbo"
}'
{
"error": {
"message": "You exceeded your current quota, please check your plan and billing details. For more information on this error, read the docs: https://platform.openai.com/docs/guides/error-codes/api-errors.",
"type": "insufficient_quota",
"param": null,
"code": "insufficient_quota"
}
}その場合はOpenAI APIにクレジットをチャージする必要があるので、その方法について以降で解説していきます。
「Invalid API Key」エラーの解消方法
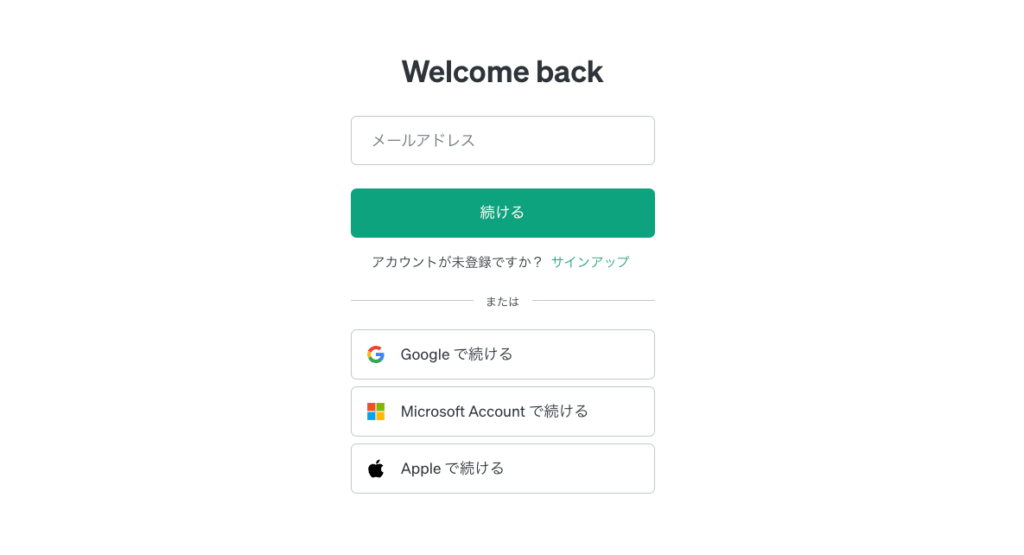
OpenAI APIにログインする
OpenAIのログイン画面にアクセスし、ログインする。
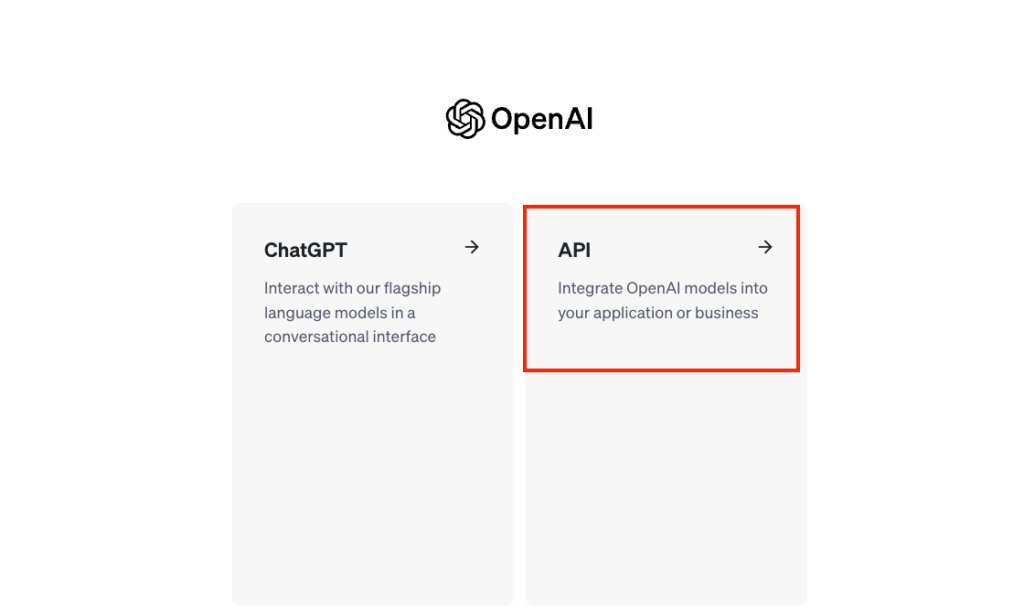
ログインすると、ChatGPTとOpenAI APIの画面のどちらのサービスにアクセスするかを選択する画面が出るので、OpenAI APIの方を選択する。
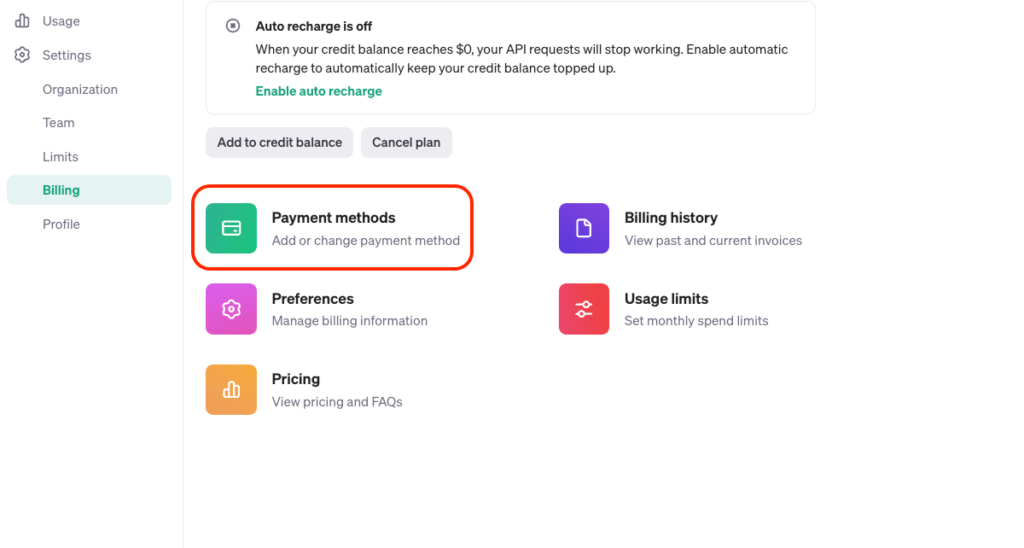
支払い設定の確認
サイドバーからSettings > Limits を選択し、「Increasing your limits」のところで無料プランになっていないことを確認する。
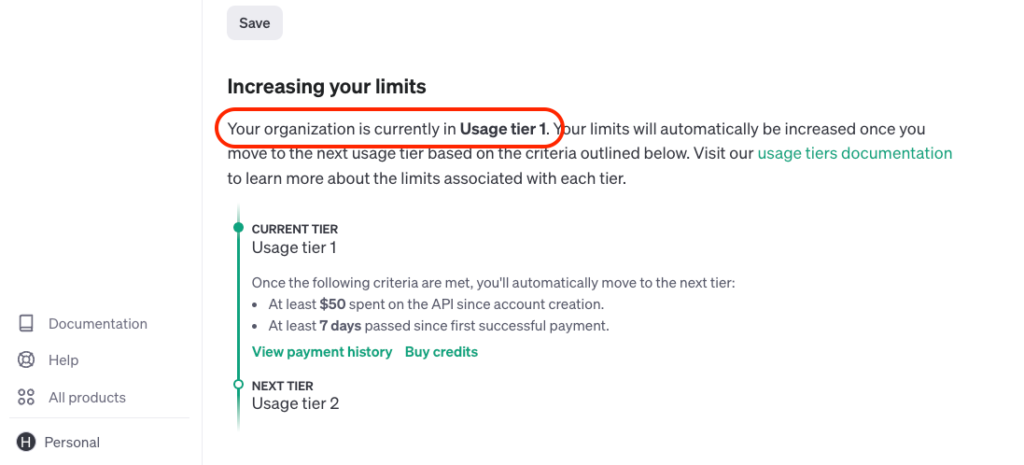
無料プランになってた場合はサイドバーからSettings > Billingを選択し、「Payments methods」から支払い方法を設定して、クレジット残高をチャージする。
APIキーを再作成する
既に作成済みでもクレジット残高チャージ前に作成したAPIキーだと引き続きエラーになる可能性があります。
サイドバーからAPI keysを選択し、「Create new secret key」をクリックする。
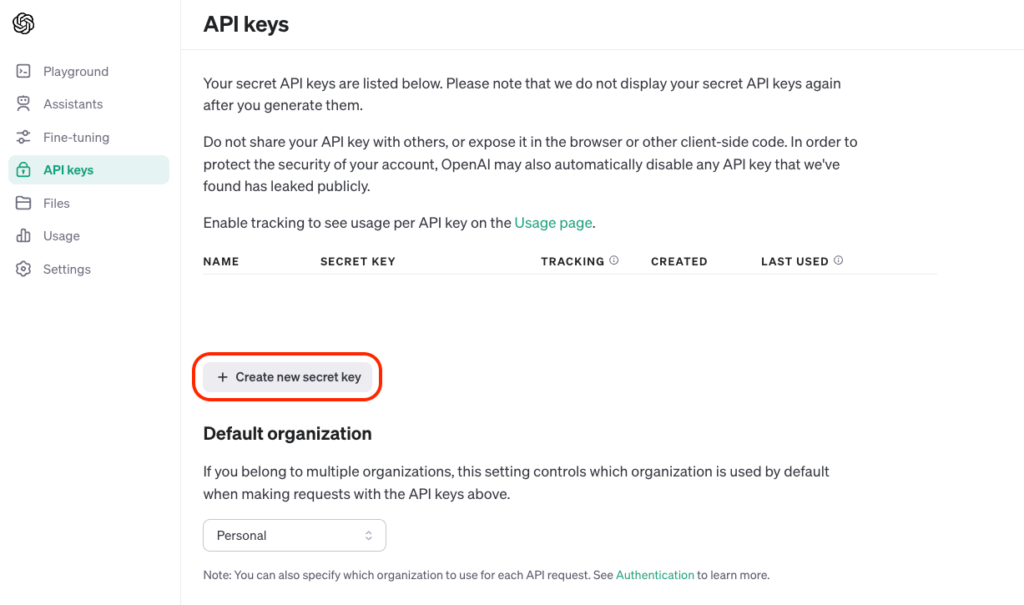
作成するAPIキーに任意の名前をつける。
今回はCursor用に作るので「Cursor」と入力。

「create secret key」をクリックするとAPIキー(シークレットキー)が作成されるので、コピーしてどこかに保存しておく。
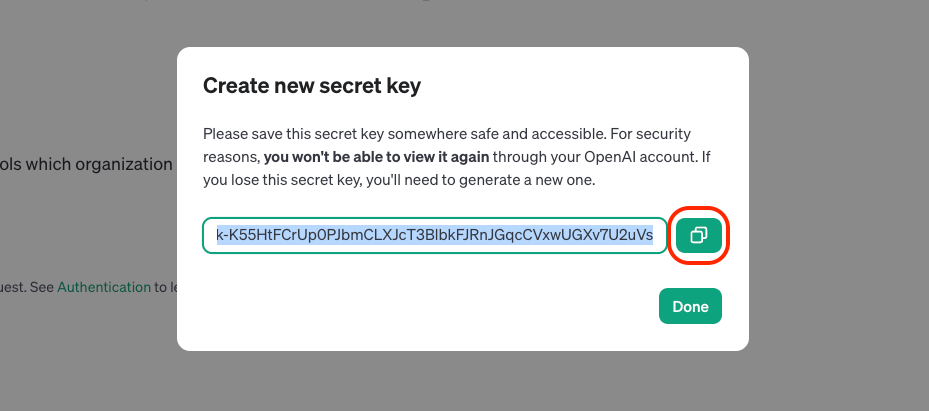
一度画面を閉じるとキーの再確認できないため、忘れた場合はキーを作り直す
CursorでAPIキーの設定画面を開く
Cursorを開いてコマンドパレットを開き(cmd + shift + p)、「Cursor: Open Settings」を選択する。

APIキーを設定する
OpenAI APIの欄にコピーしたAPIキーをペーストし、「→」をクリックする。
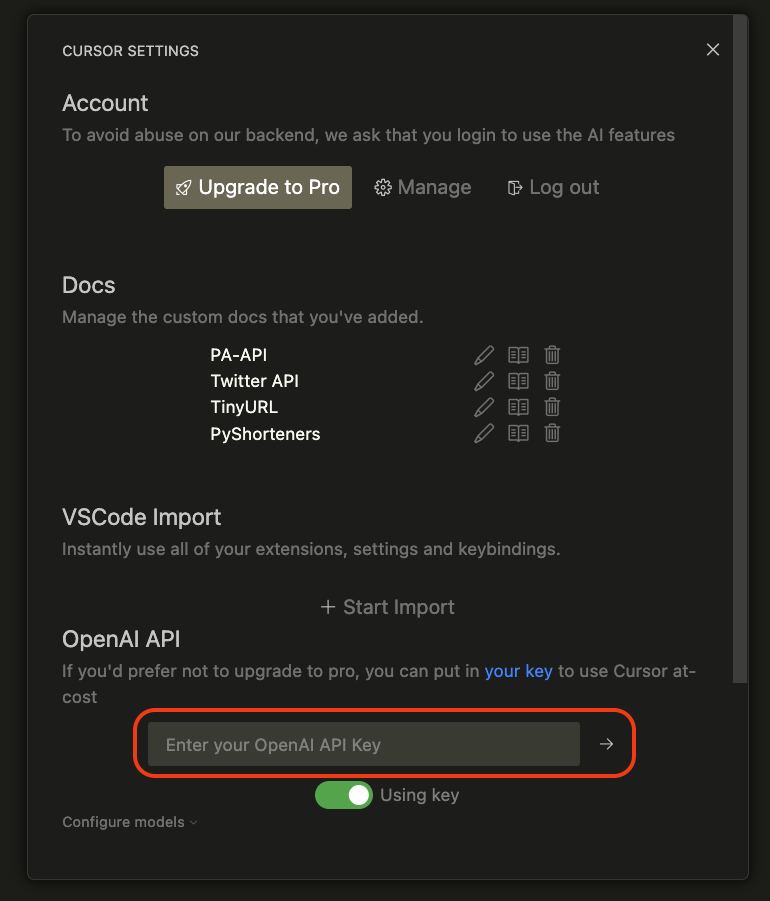
これでエラーは解消されるはずです。
まとめ:OpenAI APIのクレジット残高をチャージする
今回は、OpenAIのAPIキー設定時の「Invalid API Key」エラーの解消方法について解説しました。
まず、エラーの原因確認のため、エラーメッセージに書かれている下記コマンドを実行した結果が以下のようなクレジット残高に関するものだった場合、
$ curl https://api.openai.com/v1/chat/completions -H "Content-Type: application/json" -H "Authorization: Bearer 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" -d '{
  "messages": [
    {
      "role": "system",
      "content": "You are a test assistant."
    },
    {
      "role": "user",
      "content": "Testing. Just say hi and nothing else."
    }
  ],
  "model": "gpt-3.5-turbo"
}'
{
    "error": {
        "message": "You exceeded your current quota, please check your plan and billing details. For more information on this error, read the docs: https://platform.openai.com/docs/guides/error-codes/api-errors.",
        "type": "insufficient_quota",
        "param": null,
        "code": "insufficient_quota"
    }
}次の手順で対処することで、エラーを解消することができます。
- OpenAI APIにログインする
- 支払い設定の確認
- APIキーを再作成する
- CursorでAPIキーの設定画面を開く
- APIキーを設定する
最後までお読みいただきありがとうございました!